Art, Painting, Rock Painting
Cute Animal Rock Painting Step-by-Step Tutorial for Kids
Aug
Do you know there is actually a day dedicated to rocks? It’s called International Rock Day on 13th July. What better way to teach kids about this obscure holiday than with a rock acrylic painting session?
Rock painting is a super entertaining activity for kids. Anything their heart fancies can be painted on a rock. One of the favorite subjects for kids kids is rock art animals. Children are always intrigued about different kinds of animals, and rock painting with acrylic paints is a great way to foster their intellectual and creative interests.
So, to encourage creativity in your kids, we are here with easy animal rock painting ideas. We hope you and your kids have fun trying the ideas out!
What Kind of Paint is Best for Rock Painting?
The best kinds of paints for rock painting are acrylic paints. It can be difficult to hide the base colors of rocks. Acrylics are the perfect paints provide a good amount of coverage on the rocks, unlike other types of paint. It’s super easy to find a wide variety of acrylic colors so you don’t need to worry about experimenting with different art combinations.
Moreover, acrylic paints are highly versatile and dry quickly. They are even weather-resistant, so if you’re planning an art picnic – acrylic rock paints won’t disappoint you.
Can I Use Regular Brushes for Rock Painting?
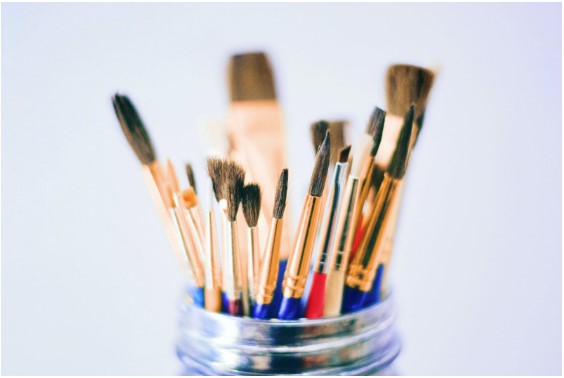
Yes, you can. Acrylic paints provide you the facility of using a wider range of brushes. Here are the best brushes for rock painting –
Round Brush
It has a pointed, round tip, and works best for detailing and outlining your work. If you control the pressure you use, you can use it for both thick and thin lines.
Flat Brush
A flat brush is a rescue when it comes to painting big rock surfaces. With a square end, it works best for thick lines and straight edges.
Angular Brush
With a flat angular tip, it works best for detailed work on corners and different angles.
Detail Brush
Detail brush is a smaller version of a round brush and is a fine liner brush. It works best for detailed art and fine lines.
Acrylic Paint Pen
When doing animal rock painting, you will often what to make fine lines in order to create details. This makes an acrylic paint pen, the perfect addition to your acrylic rock painting kit.
Easy and Fun Rock Painting Ideas for Kids
Fish Rock Painting
Paint your rock with white acrylic color.
Now, use a pencil to make the outline of the fish. Draw the eye and the mouth of the fish at the front. Also, create sets of parallel lines from end to end on the rock’s surface.
At the center of the second set of lines, draw a fin.
Take the orange color and paint the face part of the fish art. Move on to coloring the alternate lines and the fin.
Take yellow color on a small, fine brush, and paint detailings around the eye and the scales in the form of little dots. Make patterns in the fin.
Using a thin brush, make outlines on different parts of the body of the fish with the black color.
And your fish pebble painting is ready! For more specific instructions, watch this video –
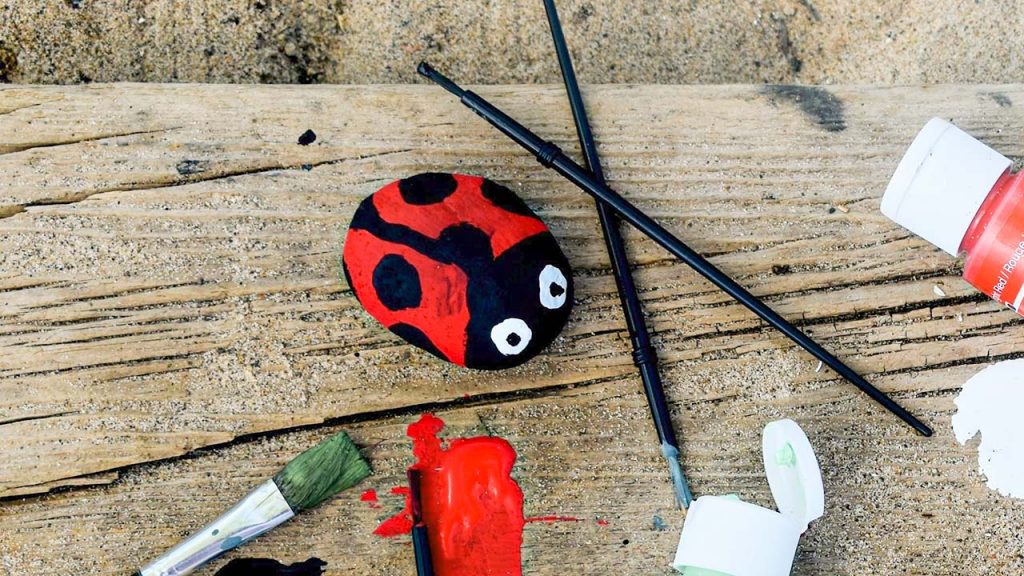
Ladybug Rock Painting
Ladybugs are one of the most popular rock painting designs. This is because it is super easy for even the most beginner of artists, and the natural shape of the rock fits the body of a ladybug perfectly!
Take a clean rock and paint it with vibrant red acrylic color.
Once it is dry, paint black acrylic at the side face of the rock in a semi-circular manner. Now, using a thin brush, paint a black line in the center from one end of the rock to meet the semi-circle. At the blank space of either side of the line, draw small circles with the black color.
On the black semicircle, draw oval-shaped eyes with the white paint. We’re sure your ladybug rock art will make for a good paperweight. For detailed insights on easy ladybug painting, watch this video:
Bee Painted Rocks
Here’s another insect rock painting idea. Take a flat brush and paint a rock with yellow acrylic paint.
Paint broad black stripes on the yellow surface, leaving the one-fourth end of the rock. Next, take the white color and make a set of round eyes. You can use the back of a pencil to do it perfectly. Add pupils with black color and make a smiley for the mouth. Now, make two almond-shaped wings just above the face on the first horizontal stripe. Use sky blue color to do so.
Tada!
Your bee rock is all set to serve you the way you wish. Refer to this tutorial to not make any mistakes while painting it:
Cat Rock Painting
Make a curved division on the rock at the center.
Paint the upper half with the orange acrylic color and the lower half with the black one. Once the color dries, take white color on a detailed brush. Make a set of eyes and a nose at the upper center of the black painted area. Above it, at the circumference of the black line, draw a set of ears with the same white-colored brush. Add small white dots in the orange-colored blank space.
To make it complete, add whiskers alongside the nose of the cat with white color. Also, paint the nose with a lighter shade of orange. You can use a black marker to enhance the outline of the eyes and the ears.
How do you like your easy cat rock painting? If you faced any problem while painting, refer to this video for clarity:
Rabbit Rock Painting
Begin with painting a bunny on the rock, as did in this video:
Once the sketch is ready, paint the whole rabbit with the skin color.Paint the background in a bright color like sky blue.
Now, take baby pink and add detailing to the rabbit’s paws, ears, and nose. Create the outline of the rabbit with the black color. Make its eyes with it and enhance other features.
Your rock painting bunny is ready!
Sheep Rock Painting
We thought this technique was so brilliant we just had to include it! Who knew such a simple technique could products such sophisticated rock painting art.
Take an oval-shaped rock and paint it with white acrylic color.
Use a thin brush and add swirls all over the rock with black color. You can also use a black marker. Once the rock is dry, paint an oval face on the upper center of the rock with the skin color. Also, make ears.
Add little feet at the bottom of the rock with the skin color. Once it is dry, add the second coat. Now, using a fine brush or marker, make eyes white oval eyes with black pupils. Do not forget to make the mouth with black paint.
And voila! You’re done!
You can also use this video for reference purposes:
Panda Painted Rock
Painted white acrylic color on the surface of the rock.
Once the color is dry, begin sketching the outline of a panda with a pencil, as shown here:
Make big eyes in a semi-circle shape with eyebrows, nose, and mouth.
Make two paws at the bottom of the rock. Paint the body, eyes, nose, and paws with black color. Outline the paws with white paint. And hey, do not forget to fill in red paint in the mouth.
That’s it! Your cute panda rock is ready to accompany you to your study table!
Penguin Rock Painting
This is one of the easiest easy rock painting ideas for kids. Take a fine brush and make the outline of a penguin on the rock with black acrylic color.
Start with drawing a wide oval belly in the middle. Join the upper ends in an M shape. Paint the outer area with black color and the belly area with white. Now, make eyes on the M-shaped space with black paint and beak below it with the red color. At the bottom of the belly, draw paws with the red color. Take the white color and add detailing to the eyes to complete your rock penguin painting.
For better understanding, refer to this tutorial:
Turtle Rock Painting

To make a cute turtle on a rock, paint it with a light purple shade of acrylic color.
On the face of it, make small squares with the dark green color with equidistant spaces. Keep it aside to dry. Meanwhile, take four pebbles of similar size and paint them in the same shade of green.
Do the same with an elongated small piece of rock that can resemble the face of the turtle. Now, stick the four pebbles on the side of the main rock with the help of a glue gun. They will look like their hands and legs. Stick the elongated rock piece at the top center. Make eyes on it with black acrylic color.
That’s it. We’ve now got a turtle painted on a rock – use this cute art piece as a centerpiece.
To get a detailed idea on how to make your turtle rock painting, see this video –
We are sure these rock painting kids tutorials will ignite a creative spark in your kids. For better results, equip your little ones with the best acrylic color supplies. RiseBrite has a high-quality set of acrylic color kits. Explore our shop here.


