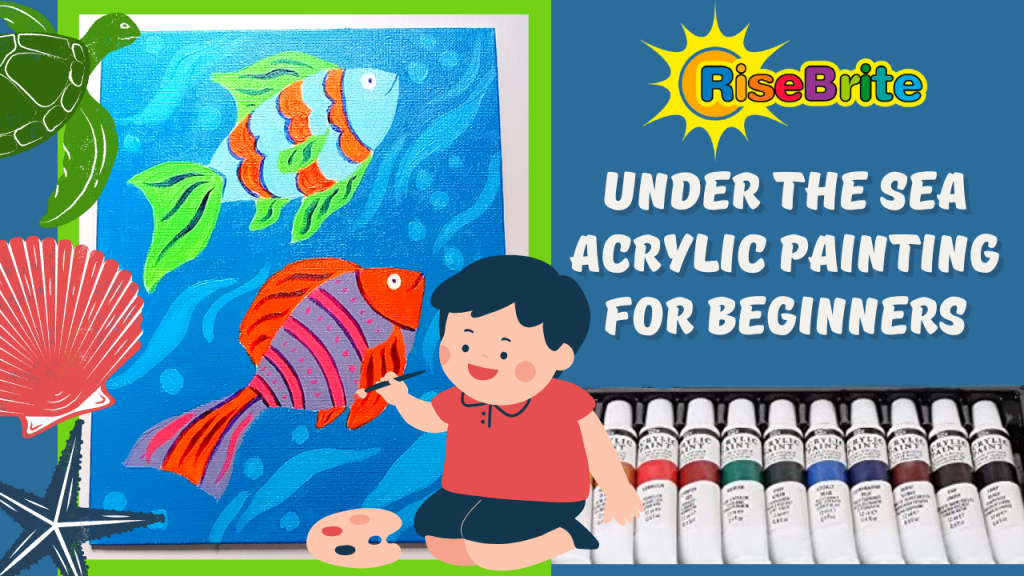
acrylic paint, Art, Painting
Simple, Cute, and Whimsical Underwater Fish Painting for Kids and Beginners
Jul
Fish painting is an interesting subject for art since kids are always curious about the underwater world. The colorful fish, deep sea, other plants, and creatures fascinate them. Therefore, how about you team them a little about marine biology but teaching them to paint it?
Painting is an expressive art where emotions are conveyed through colors. It helps your kids discover their creative spark. It’s no different for the adults too. Therefore, if you are a beginner in painting, we suggest you begin with a simple, easy, and vibrant fish art painting.Here is our step-by-step colorful fish painting guide for kids and beginners. Let’s go!
CHECK OUT THE VIDEO TUTORIAL ON YOUTUBE
Simple Fish Painting Techniques
Here are the techniques that will make fish painting easy for kids and beginners:
Dry Brush Technique
When we need a pigmented stroke of colors on the paintings, we use the dry brush technique. All you have to do is use the acrylic color in its raw form. Do not use a wet brush or water.
Washing
The washing technique is useful when you want to experiment with some effects and make the acrylic color translucent. Take out the color on the palette, mix it with water, and use it to create semi-fluid patterns.
Detailing
When you need to add more definition to your painting, the detailing technique can help you. Here, you wet the fine brush to make it more pointy and use it as a pen or pencil to create intricate designs.
Supplies for Kids Fish Painting
To make a simple fish painting for beginners, you will need the following supplies-
- A high-quality set of acrylic paints
- An A4 size drawing sheet
- Paint Brushes – filbert, round, or angular brush, fan brush, and thin-pointed brush
- An HB pencil and eraser
- Painting palette
- Masking Tape
Step-By-Step Painting of a Fish
Tip: Cover the border of the A4 size drawing sheet with masking tape. It gives a neat and structured look to the painting.
Step 1: Sketching Your Tropical Fish Artwork
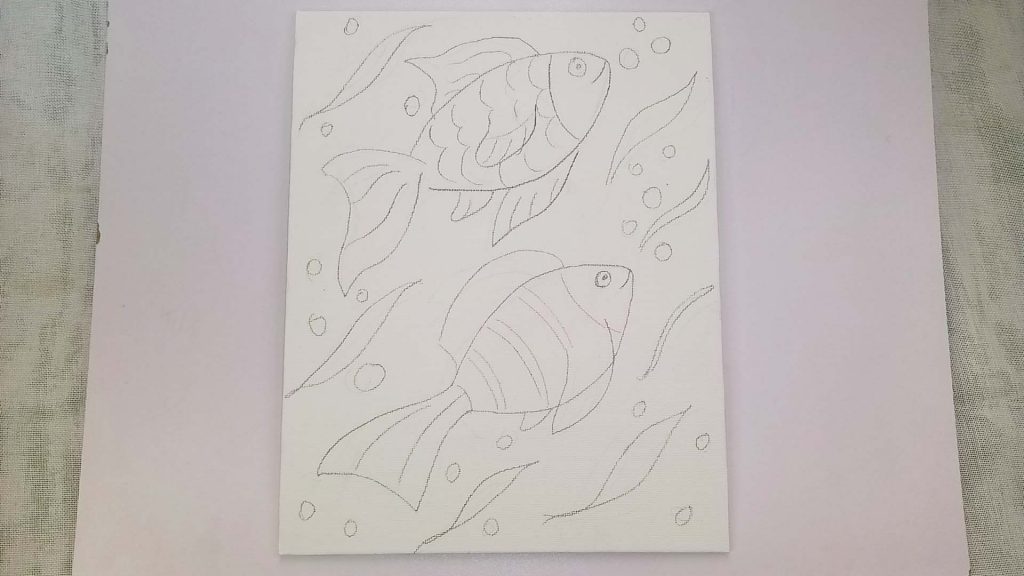
We will begin the acrylic painting of fish by making a pencil sketch of the drawing first. In our painting, we will include two fishes of different styles to bring variation. As we are taking baby steps, try to get the structure right with different parts of the fish.
The First Fish
The first fish is located at the bottom of the page in a right upward inclined position. To draw the body, make an almond-like structure with two arches starting at the same point. Do not join the lines and leave a small opening. You can find the resemblance of the body shape with that of a goldfish.
Now add the fins of Betta fish on either side of the body. At the top, draw a long fin. Then create two small fins on the belly of the fish at the bottom. The first fin will go over the body, while the second one, which is relatively smaller, will sit on the edge of the body.
To make the tail of the fish, connect the endings of the arches by extending them with curved lines. Join both of them with a half-circle opened on the outside. Add detailing on the tail by making two curved strokes.
Now we move to the upper half of the body of the goldfish artwork. Draw a curve there which will mark out the head. This is where fish have gills. Draw an eye above the mark and the mouth. In the middle and lower half of the body, above the tail, draw scales in the form of curved lines at some distance from each other.
The fish is ready. Just add some bubbles in front of the face of the fish.
The Second Fish
Let’s move on to the second fish which is at the top of the first fish. It is also in the right upward inclined position, located parallel to the first fish. Since we are aiming at goldfish acrylic painting, the structure of the body of the fish is the same as the first fish. However, bring some variation in the tail of the fish to not make them identically similar. To make a betta fish painting easy for kids, keep the design of the fins the same as the first fish. Draw the gill flap and the eyes and the mouth.
At the center of the body of the fish, draw a pectoral fin as shown in the image. You can add some detailing in the form of lines on the fins and tail. Draw curved scales on the body of the fish. Again, add bubbles in front of the face of the fish.
Other Details
Now to show water around the fish, you need to fill the remaining blank space with detailings that resemble water waves. Therefore, draw more bubbles along with wavy lines. It will also give the feel that fish are in motion in the water. You can now move to color the cute fish painting.
Step 2: Painting the Background With Blue Acrylic Paint
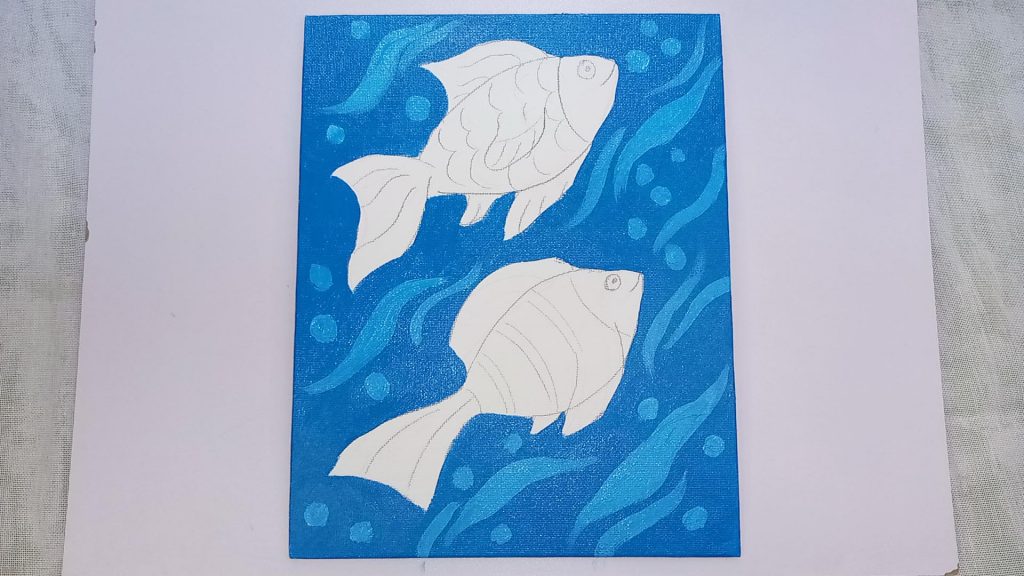
Begin painting by coloring the background first by using the washing technique. We will use a blue color to cover the space. Use a medium round paint brush and be careful to not color any other design except the background. Let the color dry for some time.
Once it’s dry, use light blue color to paint the waves and bubbles in the background. Since you need curved smooth strokes here, use a fine brush to make waves.
Step 3: Start Making a Colorful Fish Painting with Orange Paint
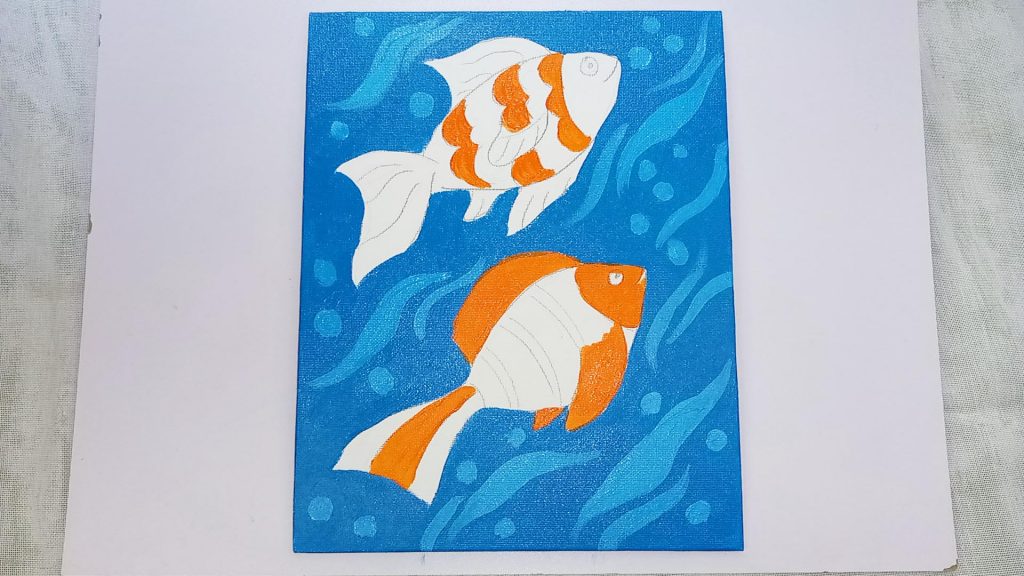
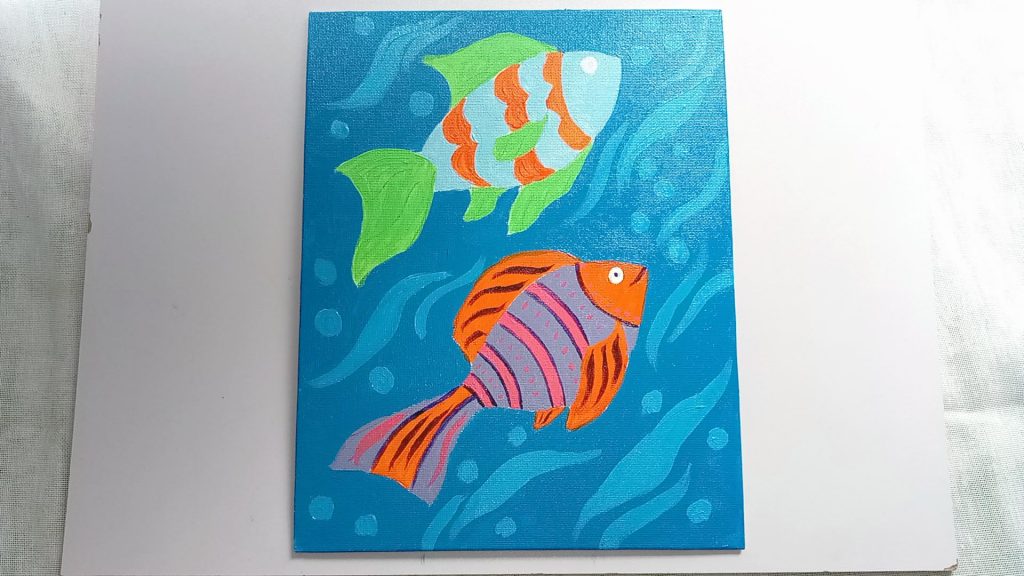
Move on to painting the first fish. We are going to use a color combination of different bright colors here to make a tropical fish painting. For the head and fins, use radiant orange color. You can color the tail with orange too, but cover just the middle part.
While you’re at it, color the scales of the second fish with orange too. Remember, we will mostly use the dry brush technique throughout the fish painting.
Step 4: Continue Your Painting of a Fish by Adding Purple Acrylic Paint
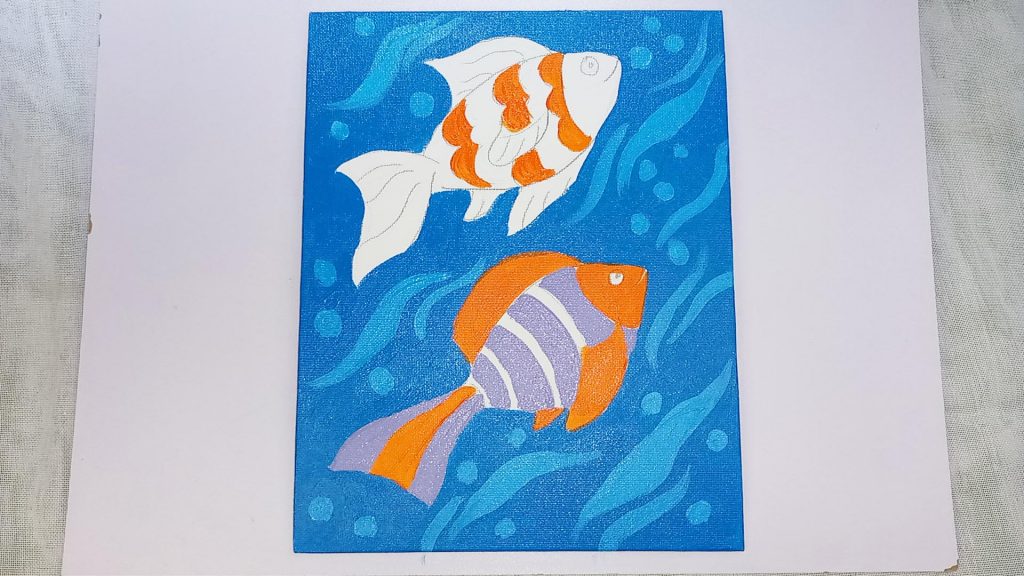
To paint the body of the first fish, take light purple. Color the remaining part of the tail with it. Also, cover some parts of the scales with this color.
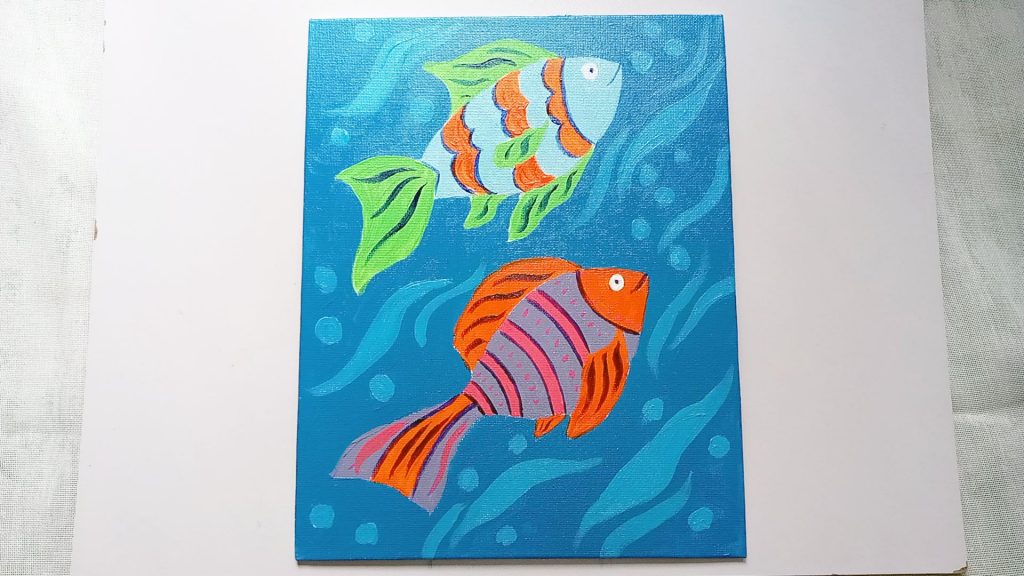
Step 6: Add a Little Pink Acrylic Paint to the Lower Fish
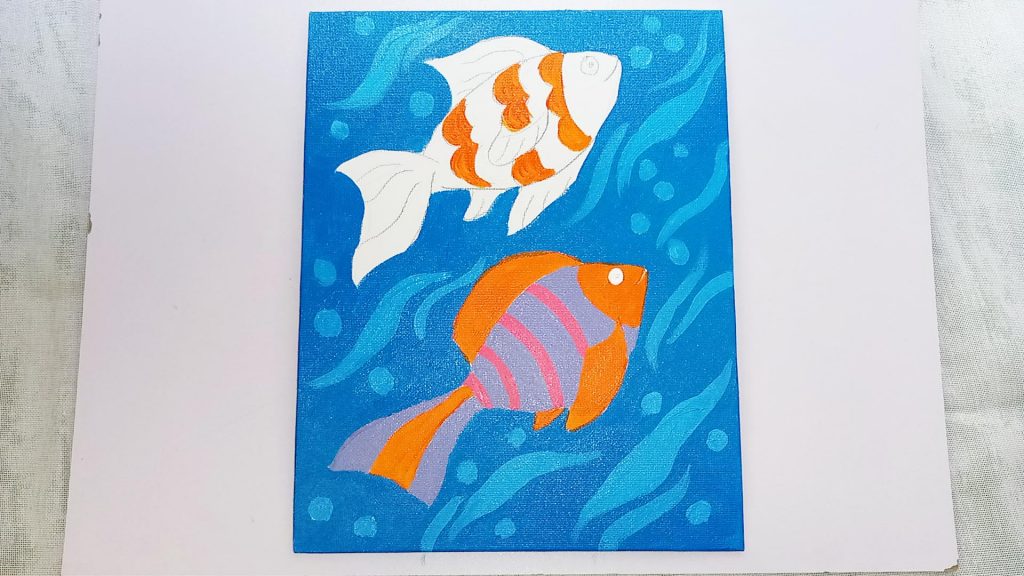
For the remaining parts of the scales of the first fish, use pink color to make lines. It will highlight the scales of the fish. Take the white color and paint the eye with a fine brush.
Step 7: Add Definition with Purple and Pink Acrylic Paint
It’s now time to use the detailing technique to give the fish an intrinsic look. Take dark purple and create lines on the border of the pink color on the scales at both sides. Use a fine pointed brush to do this. Do the same on the tail of the fish around the part that is colored orange. Make detailed lines at the center of the tail. Do the same with the fins, except make the lines a little bold and wavy. Use the purple color to make the mouth and a dot in the eye too.
To add more definition to the fish, take pink color and add wavy lines to the tail on the light purple part. On the scales, make little dots with a pointed brush.
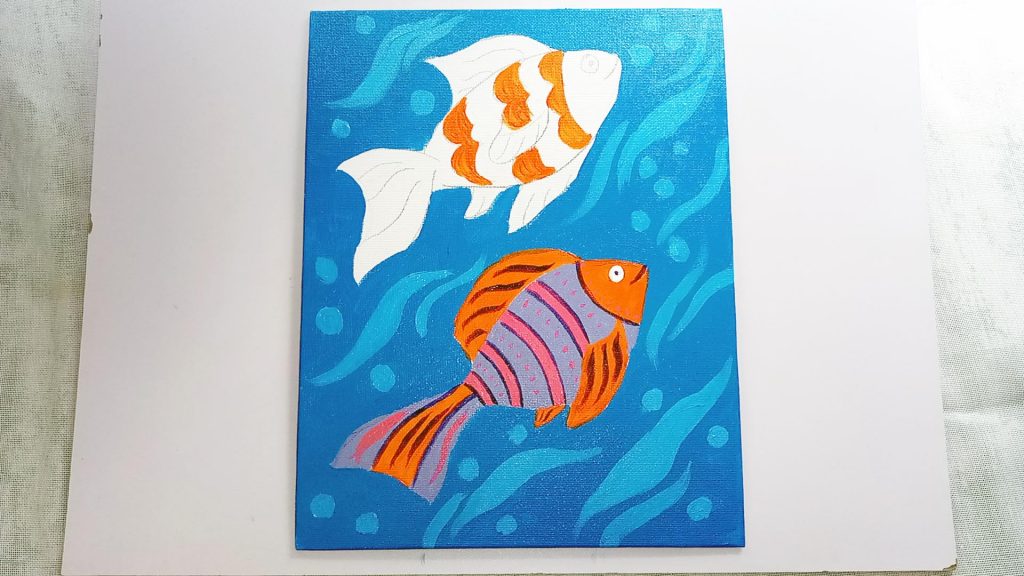
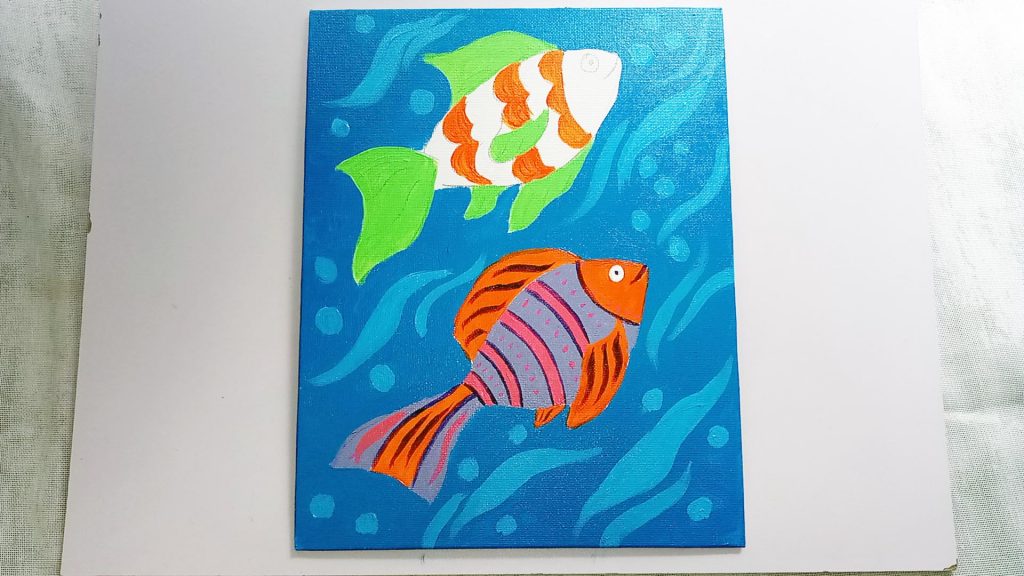
Step 8: Fill in Betta Fish Like Fins with Light Green Acrylic Paint
Let’s now start coloring the second fish. Since we are aiming at tropical fish artwork, begin with the light green color. Use it to paint the tail and fins.
Step 9: Blue Fish Painting With A Light Blue Acrylic Paint Color
Now use light blue color to paint the rest of the body. Be careful and do not mix the blue color with other colors.
Step 10: Add Definition to the Fish with Dark Blue Acrylic Paint
We will now add definition to different body parts of the fish by adding small details. Use dark blue color to make lines on the tail and fins, and underline the orange scales of the fish with it. Paint the eye and mouth with the same color.
Step 11: Add Orange Acrylic Paint Dots to Give The Painting More of a of a Tropical Fish Look
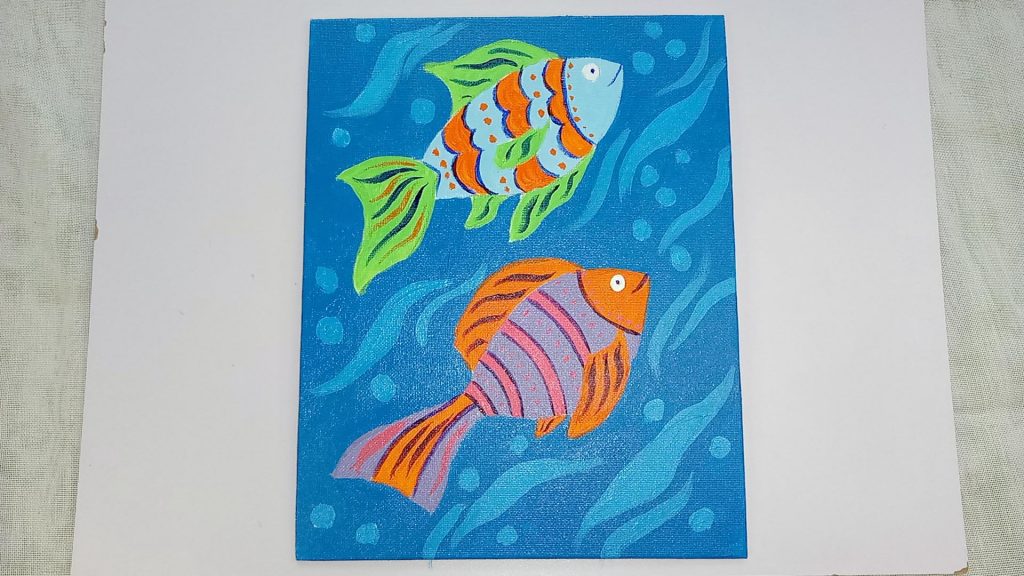
Take the orange color and create more wavy lines on the tail of the fish, alongside the blue ones. Make dots with a fine brush in orange on the light blue body of the fish.
Step 12: Add White Highlight to Bring Definition to Your Underwater Fish Painting
It’s now time to prepare the simple fish painting for its final look. To highlight the water waves, take a fine brush and add white lines to the curved waves. Outline the water bubbles the same way.
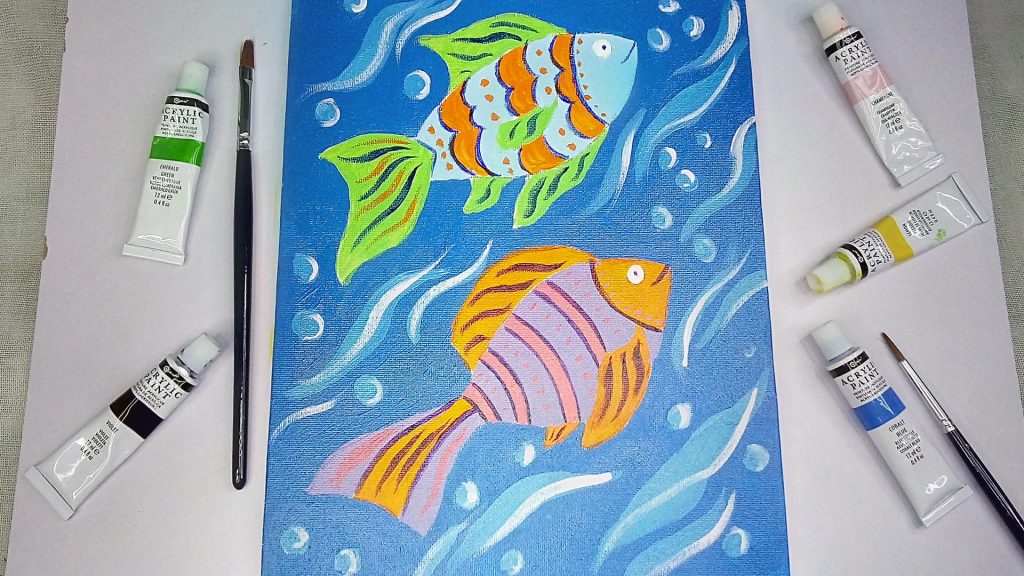
And we are done!!! Your easy fish canvas painting for kids and beginners is ready to be hung on your wall as tropical fish wall art.
Don’t forget to check out the companion YouTube video, for more information about every step.
Our art shop has a variety of all-in-one kits of acrylic colors for kids and beginners. If you are short on supplies, get your hands on them right now.


