acrylic paint, Art, Painting, Pouring Paint
Acrylic Paint Pouring For Beginners And Kids
Jun
The most fun part about arts is it keeps surprising you with its new forms and techniques. Painting is enjoyable on its own – the bright colors, the creative enhancement, the liberty to create. It becomes more interesting when you add the element of the new artistic method – pouring paints.
Free-flowing liquid paints are making fluid art more popular. It’s a mesmerizing abstract art form that takes everyone by surprise, and especially kids.In today’s post, we are taking you on a tour of acrylic pouring for beginners and kids. Let’s get started.
What is Acrylic Pour Painting?
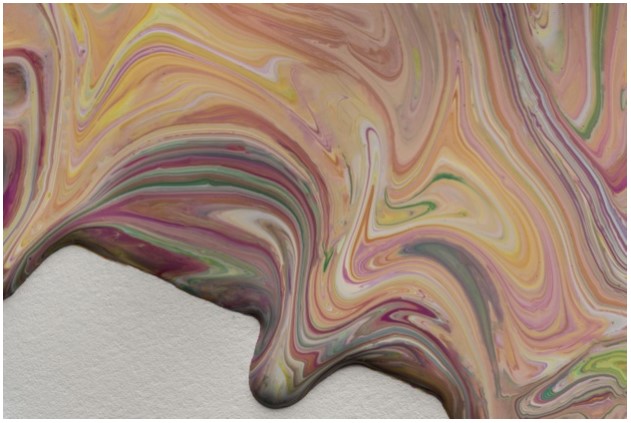
Acrylic pour painting is a fluid painting technique that involves acrylic paint as a pouring medium. You use the mixed color solution to create art by pouring it onto a surface in a variety of ways.
This fluid art painting is especially popular among beginners and kids since it is aan easy way to get desired, free-flowing, dramatic painting results. It also brings a deepened contemporary look to a painting. After completion, it gives a nice smooth, gloss-like paint-film that looks aesthetically pleasing.
What is the Best Paint for Acrylic Pouring Paint?
The key to a good fluid acrylic paint is the consistency of colors. Fluid acrylics have a thin consistency which makes them easier to pour. Thicker acrylics aren’t the most suitable choice. However, if you have no other option, you can thin them out with water.
In the case of fluid acrylics with high viscosity, you need to create a good paint pouring mixture. You need just two ingredients for it – acrylic paint and pouring medium. After mixing the paint with medium, your color pours paint should have a consistency like honey or motor oil.
However, consistency is hard to get right in DIY paint pour mixtures. Trust us, going back and forth between adding paint and adding medium is not fun. It can easily irritate you. Therefore, the best bid is to buy the ready to pour acrylic paint. It’s pre-made, so you can use it right away. There will be no interruptions while experimenting with your first fluid painting.
Preparation to Begin Pouring Paint
You need to get your canvas ready to begin fluid acrylic painting. You can choose traditional stretched canvas, canvas boards, or painting panels.
- Insert canvas keys into the canvas. DO not stretch it too much or your painting will ruin.
- To bind the paint to the canvas, apply Gesso before putting the paint onto it.
- Cover the back of the canvas with a film of paper or plastic so that you don’t accidentally get paint over the back.
- After priming the canvas, let it dry for a day. You can also apply a second coat to have a better finish. After it dries, you can use sandpaper to smooth out the surface.
Involving these steps gives you seamless painting results. However, if you are only experimenting with easy projects, you do not need to prepare exhaustively. You can get started right away as a beginner.
What are the Different Types of Pour Painting?
At first glance, pour painting can look like an art type that has a single method to it. However, there are different types of pour painting techniques. Each technique produces a different kind of pattern. If you are ready to experiment, get started with any of these you are comfortable with.
Dirty Pour Painting Technique
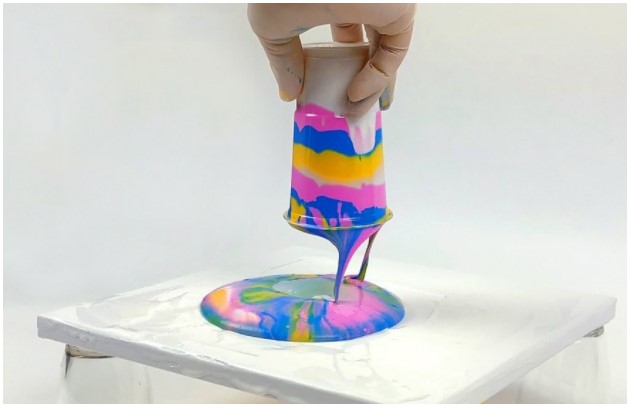
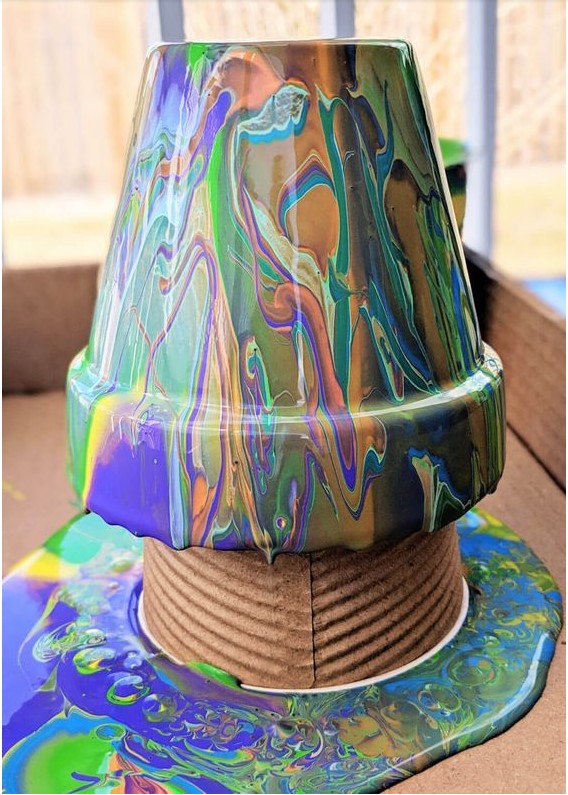
By far the most common pouring paint technique is the “dirty pour” technique. It also has several sub-techniques such as the: flip cup, tree ring and straight paint pour techniques.
The dirty pour painting involves layering different individual colors in one cup and pouring them all onto a surface at once. It is commonly used since it delivers unpredictable results. All you have to do is mix colors on top of each other in a container. You can stir a little bit for a dramatic effect, then pour it on the canvas.
Check out this video on how to do a basic dirty pour acrylic painting
Flip Cup Dirty Pour Painting
In the flip cup technique, the acrylic paint colors are first combined in a cup. Afterwards, the cup is inverted and poured onto a canvas. Some people preferred to place the canvas on top of the cup before inverting it, while other like to simple pour the paint onto the canvas. Each method will produce a unique pattern.
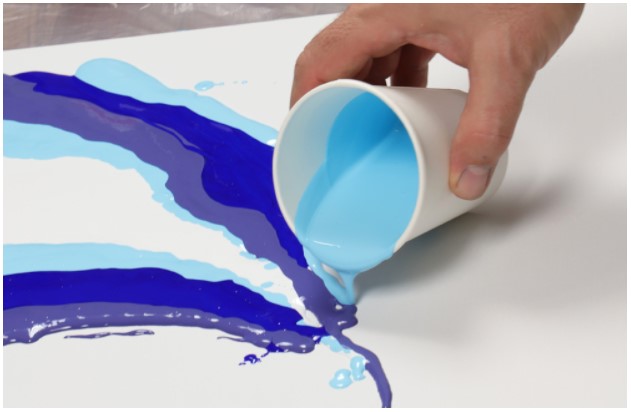
Straight Pour
There is a bit of confusion of what the “straight pour” technique actually is. From our research, we have come to define straight pour painting as another subcategory of dirty pour where all the colors are first combined in a cup, and then all colors are poured onto the substrate with a steady hand so that all the paint hits the substrate at the same location.
However, some have defined it stating that “you do not use a cup to mix colors. Instead, you pour the colors directly on the substrate from the center, from the side, diagonally, or any other pattern.
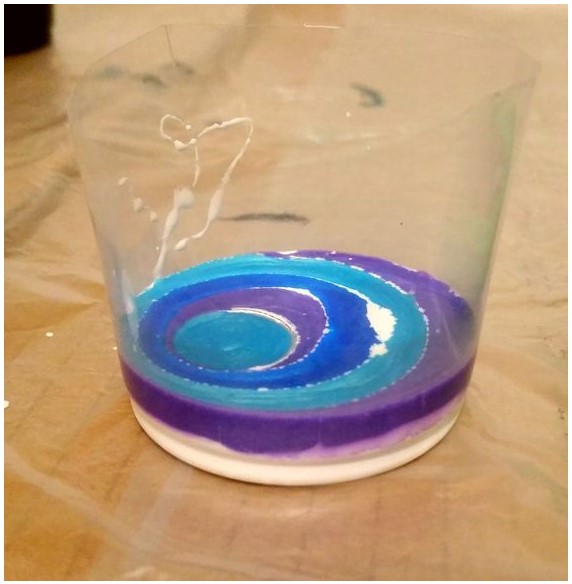
Swirl / Tree Ring Dirty Pour
The acrylic swirl painting or ring pour utilizes the dirty pour technique but in a circular pattern. It creates circular movements to create patterns that resemble patterns “tree rings.”
Using A Strainer / Colander With Your Dirty Pour Painting
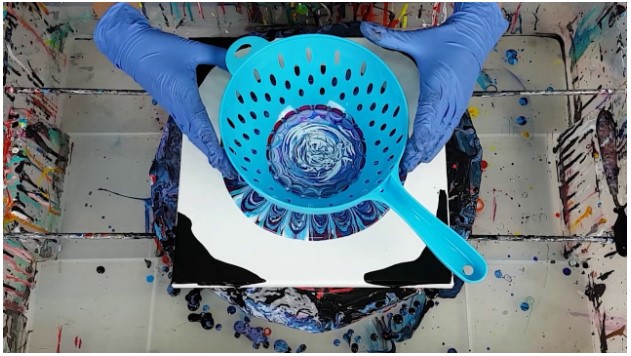
The strainer or colander pour painting is an advanced technique that helps in creating a painting with a kaleidoscopic effect with the standard household colander. It is a mix of dirty pour technique and flip cup technique.
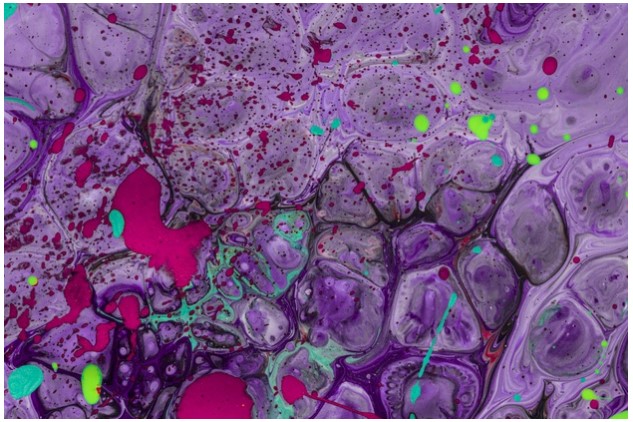
How To Create Cells In A Pour Painting
To give a cell-like structure to your abstract art, you can use:
Resin
The pouring resin mixes seamlessly with fusion and gives unique artwork as a result. You can use it for creating a beach scene – it gives a fascinating look of waves.
Dish Soap
In absence of resin, you can use dish soap to create different patterns of cells. You can also use silicone oil.
How To Do A Dutch Pour Painting With A Hair Dryer
A dutch pour painting technique is used to create abstract shapes or flowers. After pouring paint on the canvas, you use a blow dryer to spread the color and create beautiful effects.
How To Do The Puddle Pour Painting Technique
In the puddle pour painting, you create a series of puddles that incorporate a drop of two of each of your colors. You can arrange them in any pattern you want – linear, polka dot, or other random art.
Get 30% ($10) Off On Amazon!!!
Wondering How To Get Started?
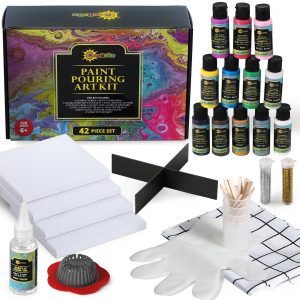
It's easy as pie with our Complete Acrylic Pouring Paint Kit
Available On Amazon!!!
![]()
Common Colors and Good Combinations
You do not need multiple colors for creating fluid art as a beginner. The combination of two or three colors works beautifully, given the combination colors compliment each other.
Black & White / Black With Other Colors
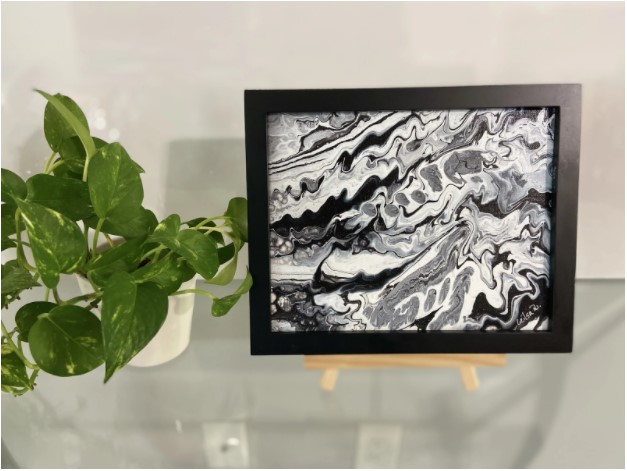
The combination of black and white gives an achromatic look and makes other colors look more vibrant. Black gives an overpowering and dark effect. You can subtle it down by mixing it with red and green, violet and yellow, or blue and orange.
Rainbow
To create a rainbow color effect, mix red & white then pour orange and white to fade out the red. Yellow also goes well with the combination. Do the same with other rainbow colors.
Blue
Blue, especially ocean blue goes well with warm colors like red or orange.
Metallic
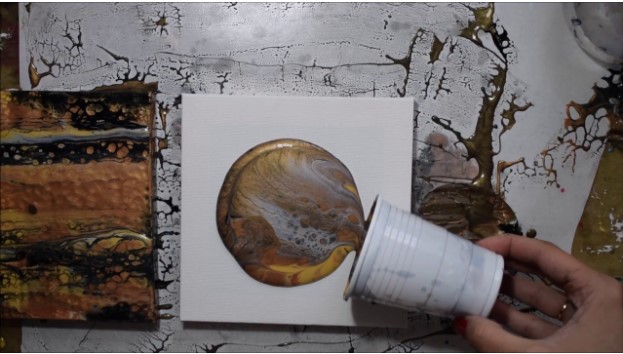
Golden works best with a lot of colors – black, white, blue, red. You can use silver with light shades of pink, blue, and purple.
Things to Paint On With Paint Pouring
You can choose various surfaces for pour painting –
Canvas
Canvas boards, traditionally stretched canvas, or painting panel is the most convenient option. They are a suitable choice for beginners.
Rocks
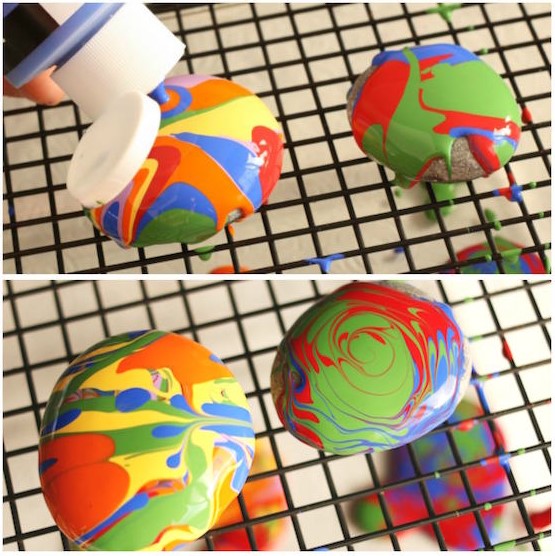
Pour painting rocks is an interesting activity. Choose a rock with a smooth surface and keep it as a decor item in your home.
Wood
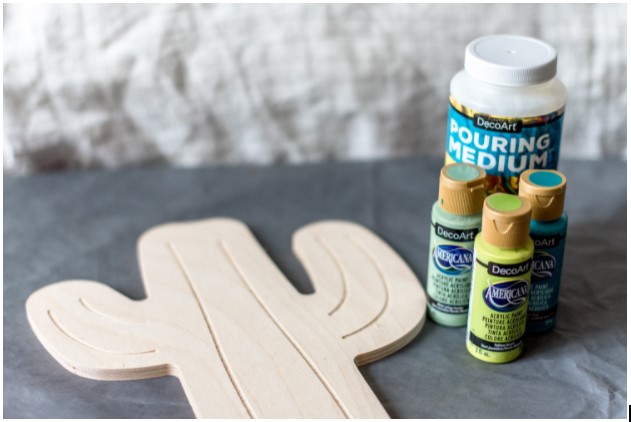
If you want to redecorate a wood table, you can use it as a surface for pour painting. It is a stable surface to paint on and you can even cut it into different shapes.
Glass
Pouring on the glass surface is fun since it gives a transparent surface and a view from the backside. It may require a primer to adhere to the shiny surface. You can also pour paint glass vases.
Furniture
Instead of getting rid of old furniture pieces like tables, lamps, shelves, or drawers, give them a makeover with pour art painting. Choose a hard finish like resin to avoid dents and scratches.
What Subjects To Paint With Pouring Paint
You can paint anything you like on your first try. We have some recommendations for you.
Galaxy
Pour painting galaxy is one of the most intricate designs. It involves dark hues and results in fascinating artwork. However, since it involves detailing, it is hard to paint and is, therefore, a better-suited choice for people with experience.
Learn how to pour paint galaxy by this video tutorial:
Geode
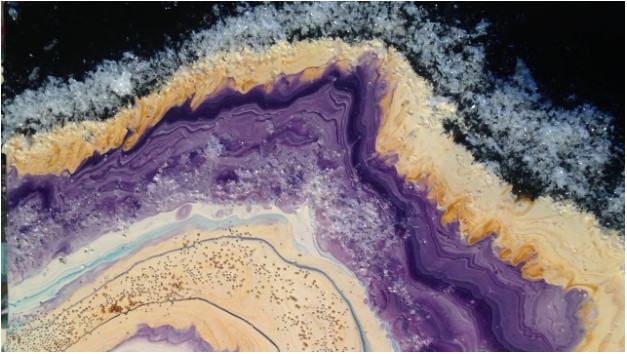
Geode art is similar to puddle pour. The artwork is inspired by natural geodes. You can add resin, deco stones, glitter, and real crystals and minerals to make it look more realistic.
With this video tutorial to learn more about geode acrylic pour:
Silhouette
Silhouette pour painting is one of the easiest subjects to paint. An abstract silhouette as the background gives a different narrative to the main painting. There are no rules, you can proceed as you like.
Learn more about it in this silhouette pouring paint tutorial video
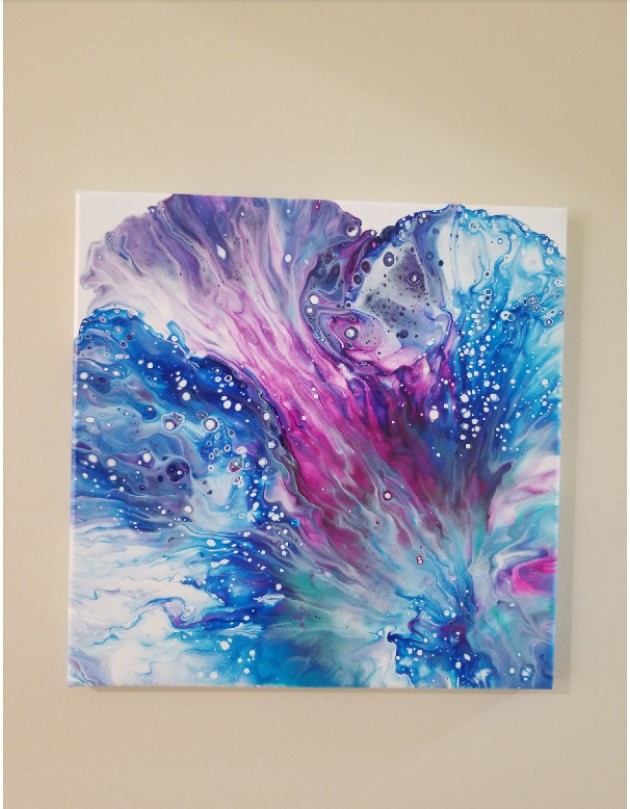
Ocean
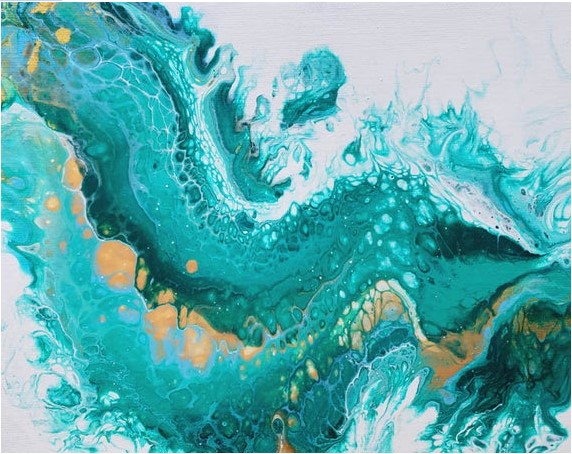
Ocean pour painting is one of the most fun and fastest projects you can do. However, it is difficult for beginners to get the waves and swirls right. With practices and techniques, you can make the beautiful coastal decor.
Watch this video to learn more about it:
Acrylic fluid art is one of the most intriguing painting art. Swirling the colors in different directions to create an art piece also makes you calm and stress-free.
We hope you enjoyed this introductory guide to acrylic pour painting. If you require painting supplies, reach out to us at RiseBrite. Our tool kit will help you and your kids to create a beautiful art piece
Get 30% ($10) Off On Amazon!!!
Wondering How To Get Started?
It's easy as pie with our Complete Acrylic Pouring Paint Kit
Available On Amazon!!!
![]()


