Uncategorized
Easy Galaxy Watercolor Painting For Kids and Beginners
Sep

Welcome to a new tutorial! Let’s make this galaxy watercolor painting!
Step 1:
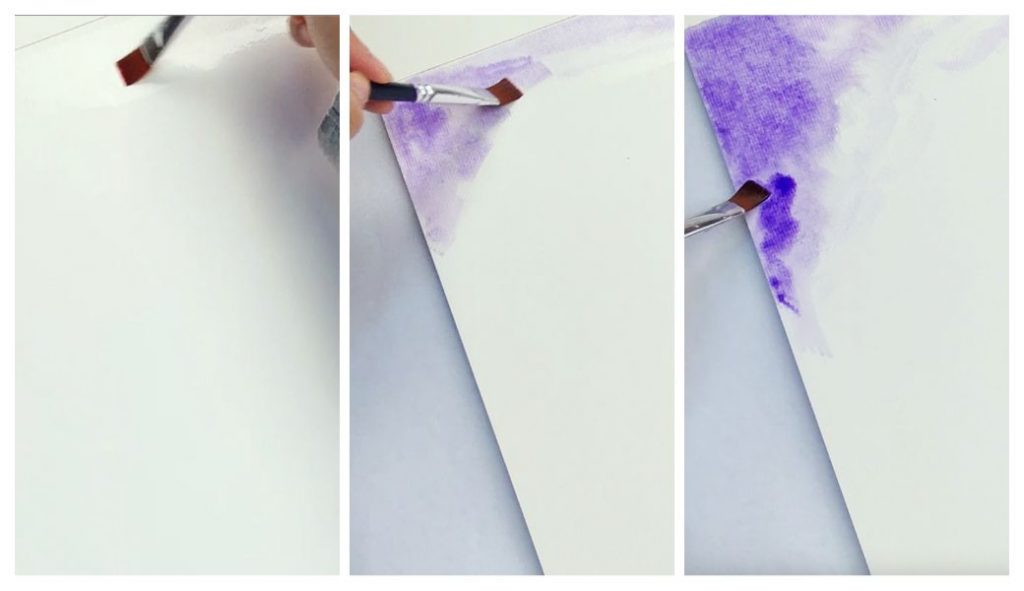
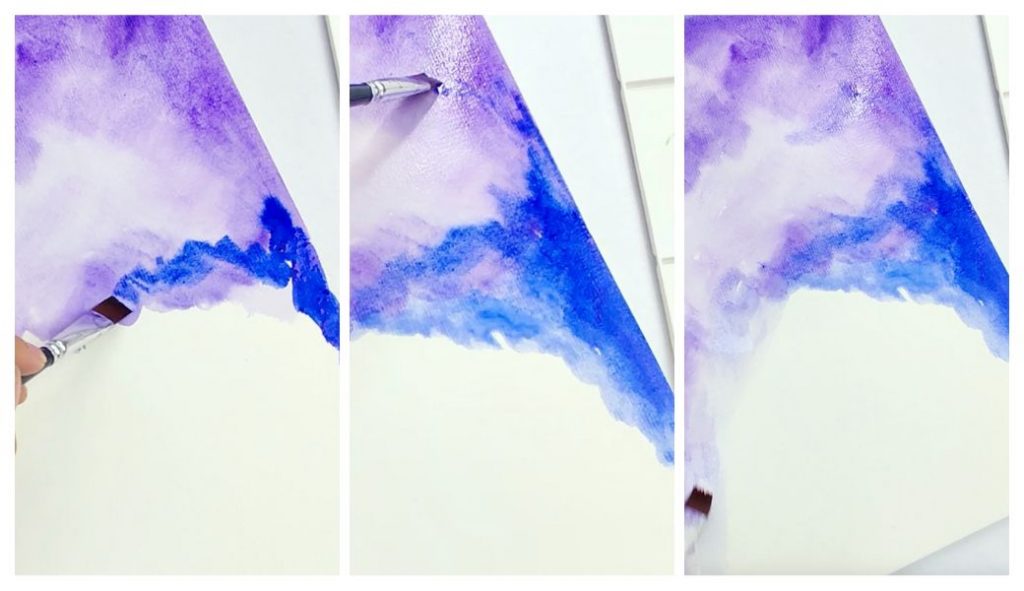
Start by placing a little bit of water on the top of the paper. Apply a violet watercolor over the wet area and spread the color. Paint from corners and add water to thin and extend the color.
Step 2:
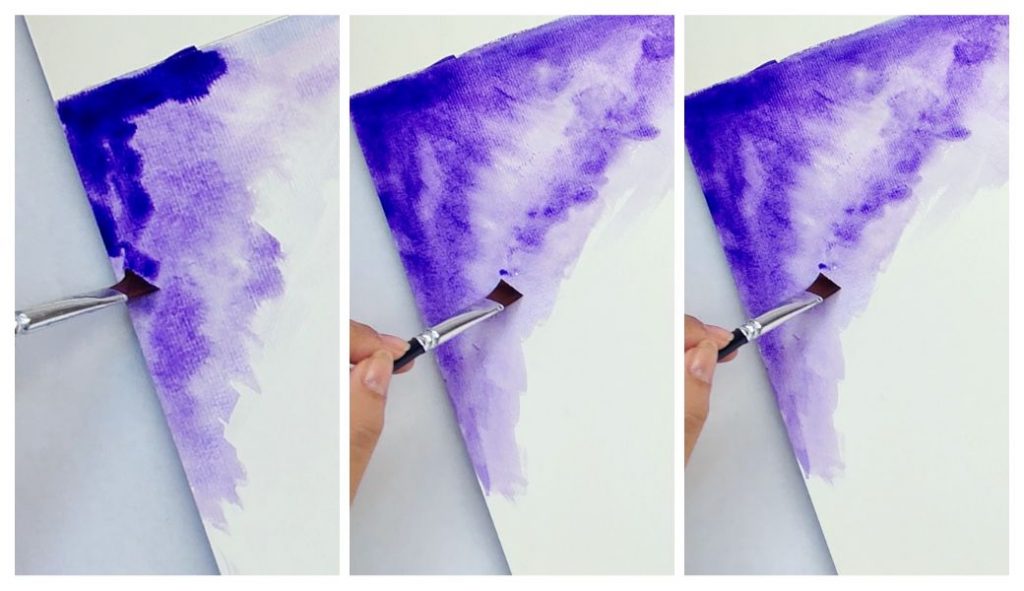
Cover the corners with more paint, this time using an intense violet. Leave some spaces unpainted to create the effect of clouds. You can use a flat, filbert or round brush. I’m using a flat one. Mix tones using a water and more paint. Continue from the edges to the center.
Step 3:
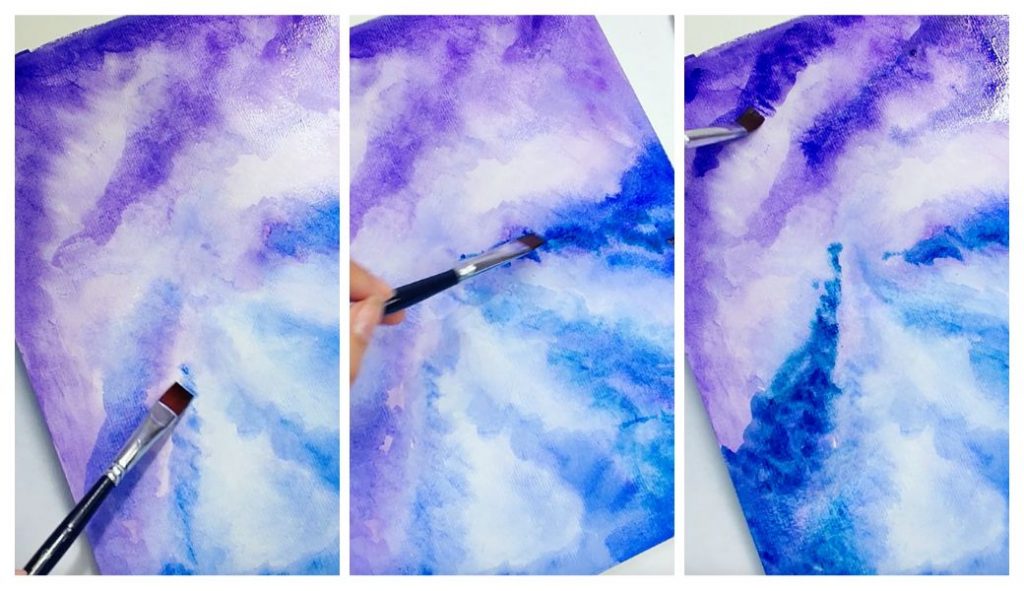
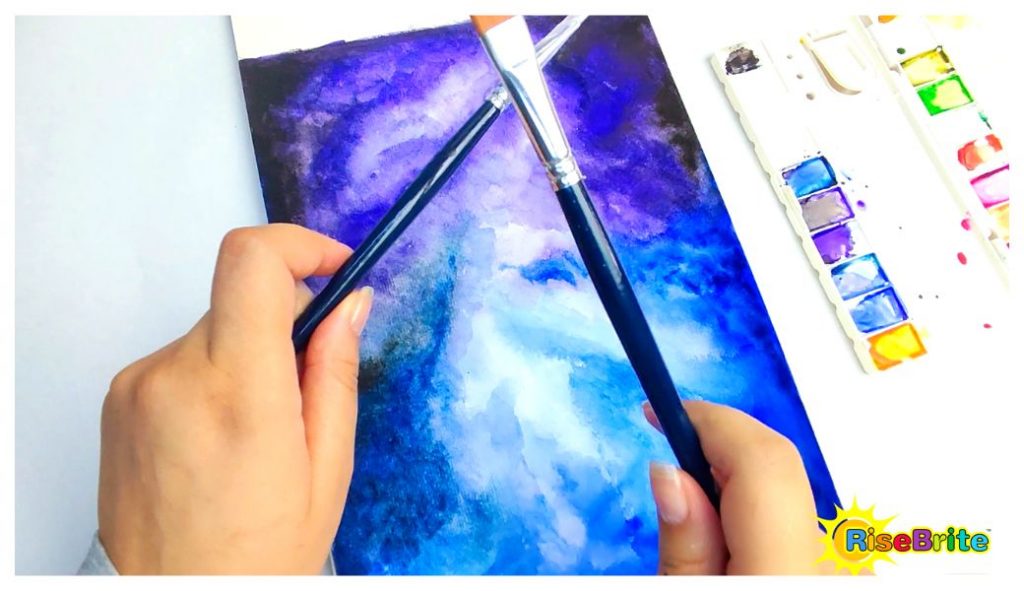
Now blend the dark blue color from the middle to the bottom. Remember to apply water on the paper first and then the paint.
Step 4:
Create a galaxy effect by dabbing your brush on the paper.

Step 5:
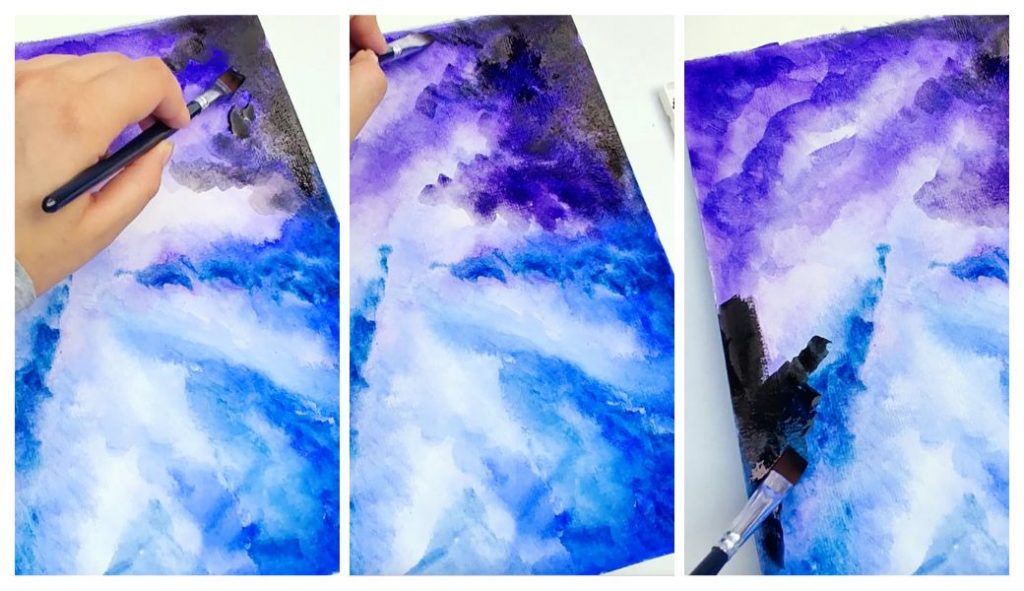
Let it dry a little and apply more color to highlight the tones.
Step 6:
Let it dry again and then add the black color. Blend the background colors with black from the edges to the center.
Step 7:
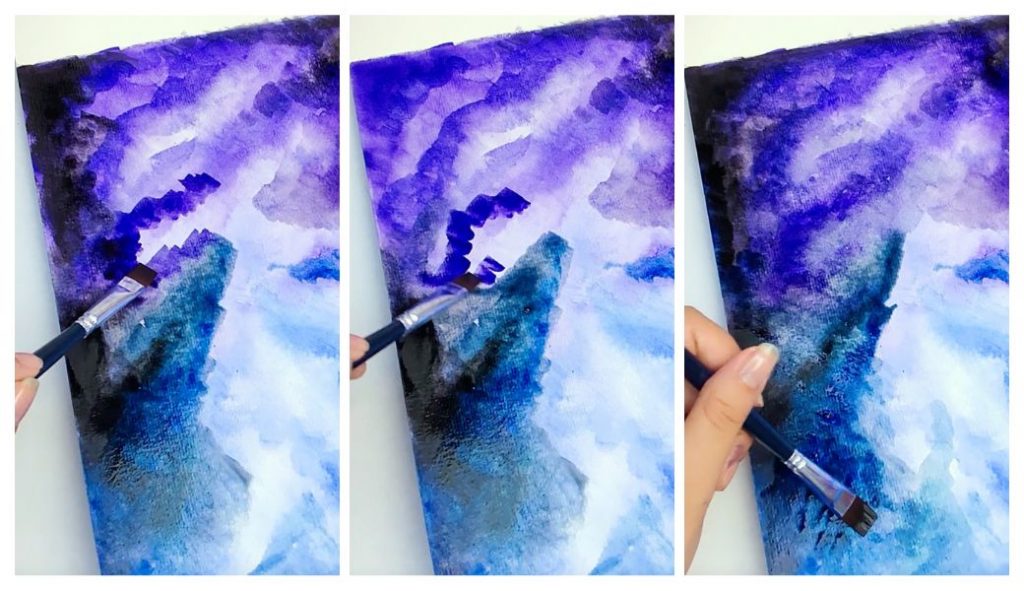
Apply light touches and create color transitions using a little water. Paint with the pure color to degrade it with black. Let the colors integrate and when it is dry continue with the stars.
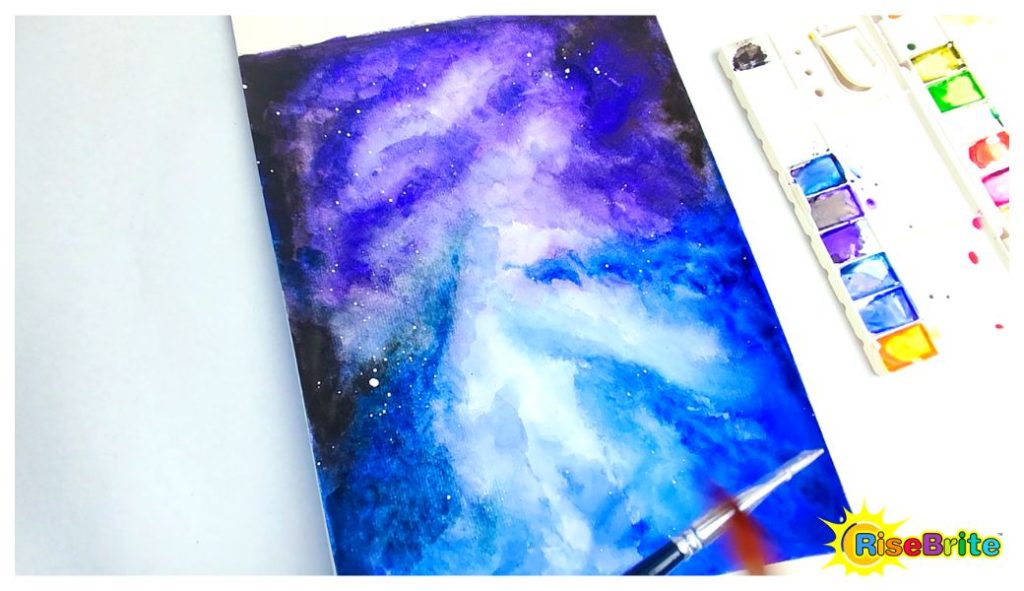
Step 8:
Mix the white color with a few drops of water. Pick up the mixture with a brush and with another hit for spalashes.
Step 9:
Repeat the process until you have so many starts.
Step 10:
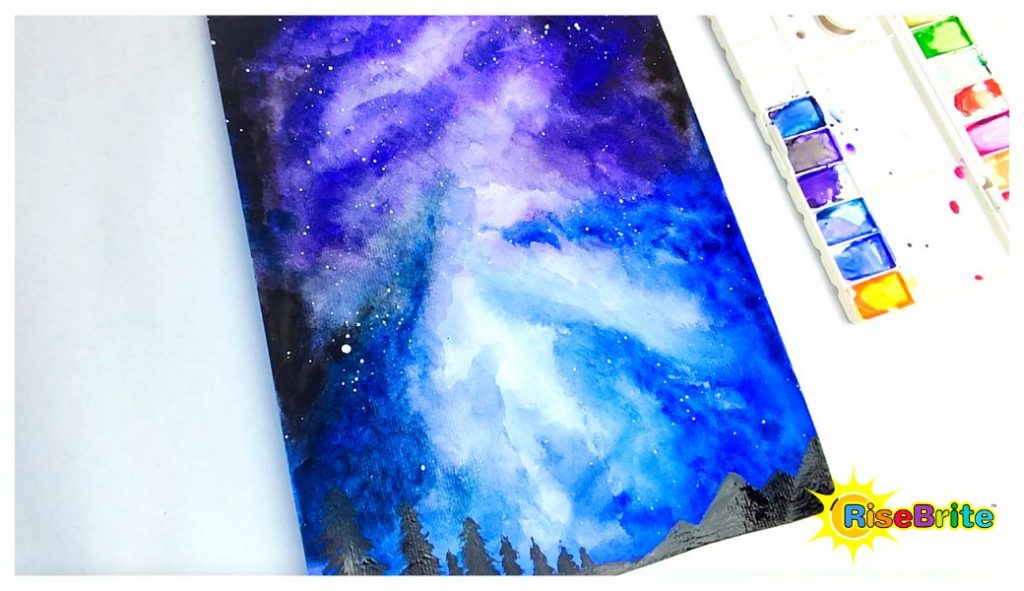
Now with black paint and a fine brush, draw pines on the bottom edge. Also, add some mountains.
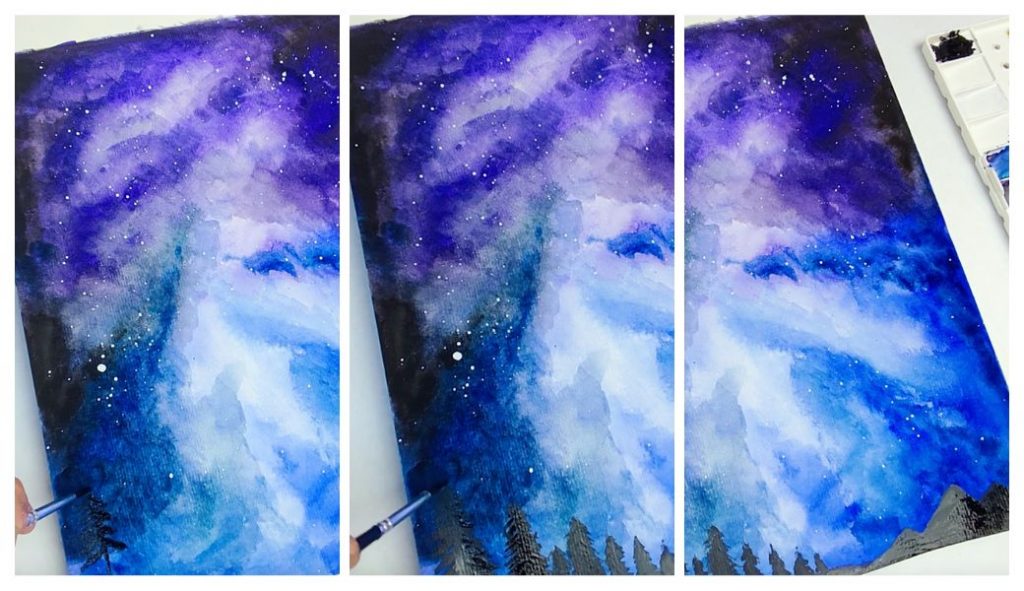
Step 11:
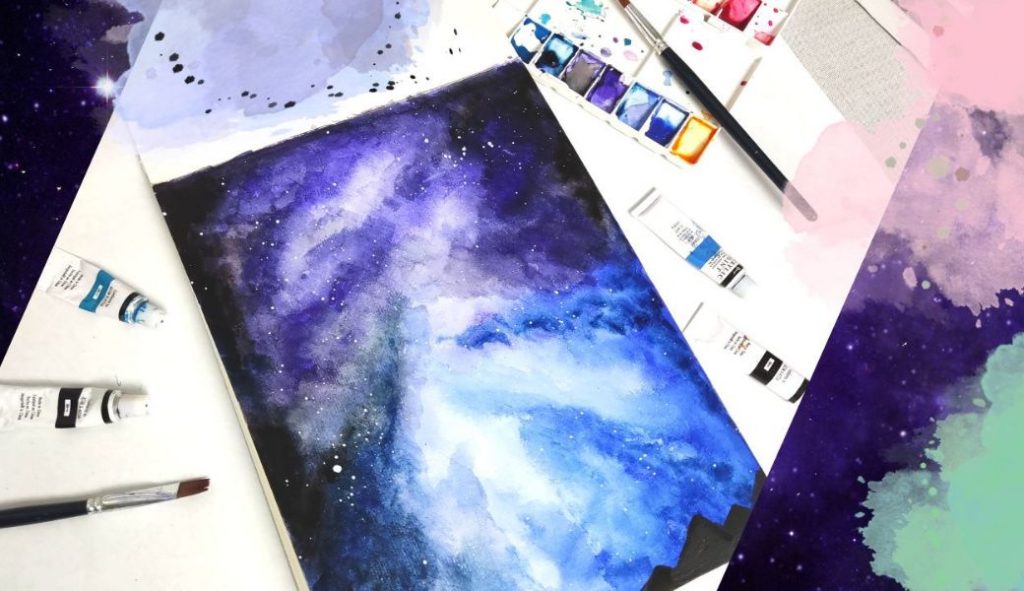
Let your paint dry completely and that’s it! This is what our beautiful galaxy will look like!