acrylic paint, Art, Painting
3 Easy Abstract Acrylic Painting Ideas For Kids
Mar
Painting is an excellent artistic activity for children. It allows them the opportunity to express themselves in a creative manner. It also allows them to build skills and participate in activities that are not screen based, which can be a nice change for many young kids these days. Lastly, it provides a great opportunity for parents to bond with their children by sharing a creative experience with one another.
Supportive videos for each of the projects and techniques below can be found here
Are Acrylic Paints Safe For Kids?
Because you are a good parent, this may be an immediate question that pops into your head. The short answer is yes, acrylic paint, when used for art painting projects, is non-toxic. Just practice safety as you would with any other activity. Wash paint off your kid’s skin completely after their project is done, and dry paint in ventilated areas.
Why Abstract Acrylic Painting Is Great For Kids
An abstract painting project is one of the easiest art projects for kids to do with acrylic paint. Abstract art’s lack of rigid rules makes it perfect for even young children who have not yet been introduced to artistic concepts. Without the need to possess fine motor skill or a high level of concentration, your budding artist is free to discover their innate artistic ability without getting frustrated by some of the demands of more technical art forms. The ability to produce beautiful paintings with such ease can be a great way to unlock your child’s creativity and introduce them to the pleasures art.
Abstract acrylic paintings also have the benefit that they do not require a lot of official painting supplies to create. You may be surprised to find out that some of the things you have lying around the house can be used as painting supplies. Toilet paper rolls, rolling pins, sponges, Saran Wrap and masking tape are all items that can be used by your child to make amazing art. Other mediums kids love such as glitter, pasta shells, and yarn or string can also be easily added to an abstract acrylic painting to provide more fun.
When preparing for your kids abstract acrylic painting, keep in mind that doing abstract art can be messy and acrylic paint can stick longer than other paints. Therefore, you will want to put down some easy to clean up protection beforehand and case things spill or splatter. Kids should cover up with a smock or apron, or at least some old clothes that they do not mind getting messy.
Below we have listed some of the easiest abstract painting projects using acrylic paint that are simple enough for even young children to do.
Abstract Geometric Shapes Project With Masking Tape For Kids
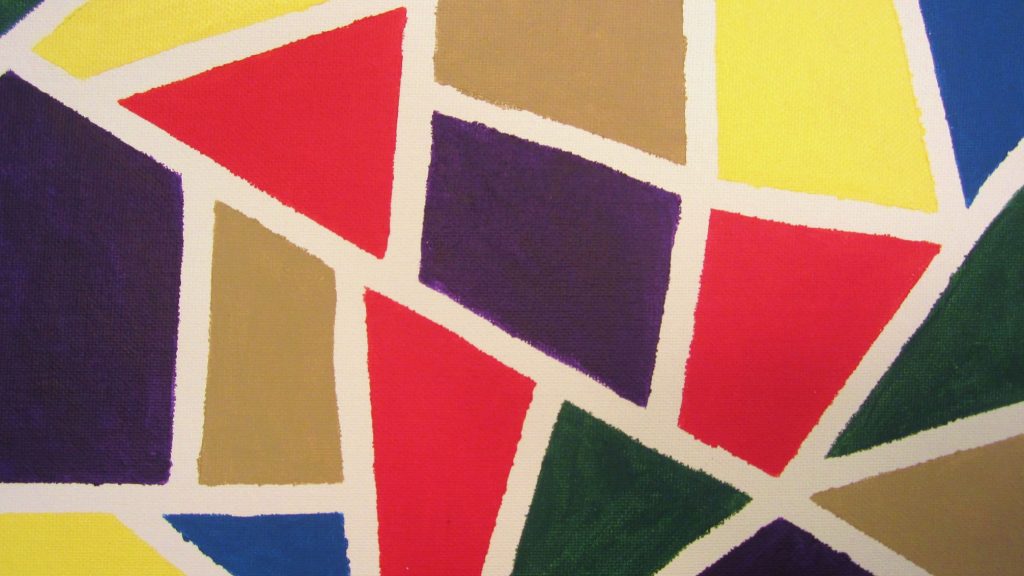
Masking tape can be a child artist’s best friend when it comes to an abstract acrylic art project. The masking tape allows your child to easily create straight lines and well defined shapes which can be difficult for young kids (and adults) to do naturally.
Laying The Masking Tape
In this kind of abstract painting project, your child will first lay down tape onto a canvas. For best results, the tape pieces should stretch from one end of the canvas to another. Kids can lay the tape in any orientation they want, but placing them at random angles will produce shapes with the illusion of movement and action. Additionally it will be easier for a young child than trying to orient each piece identically.
Whichever orientation your kid chooses for their painting, as the number pieces of tape laid onto the canvas increasingly intersect, a myriad of geometric bodies will begin to take shape. Have your child continue to add tape until about 80 percent of the canvas remains uncovered. Once there are several geometric shapes created by the tape lines, your child is ready to start filling in the shapes with paint.
Background Painting Techniques
Your child can choose to apply a single, mix or blend of colors. The single color choice will produce more of a “pop art” feeling. Bright colors work really well especially if your little artist is planning to decorate their room with their creation. A project where kids mix colors provides an opportunity for them to learn about color interactions. They will want to work with colors that complement each other well, unless brown is their favorite color. Blending paints is a little more advanced technique, so make sure it is age appropriate. if your child would like to paint additional objects in a foreground layer, gradients make for a nice background as it will make the foreground objects pop more.
Prepping And Brush Choices
Before adding paint, it is a good idea to spray a mist of water onto the canvas using a water bottle. This will help the paint seep into the canvas a little more.
As far as paint applicators, a larger brush is an obvious good choice. This is especially true for larger canvases. The brush can be either sponge or bristle. A sponge brush will produce a smoother texture, while the bristle brush will produce a more variable one. Both work very well for the blending technique. If you choose to use a bristle brush, brushes with nylon hairs work better with acrylic paints. As far as shape, a flat or bright shaped brush will be good choices as they are made for applying a large amount of paint quickly.
There are a few brush alternatives for acrylic painting backgrounds. A paint roller can also work. It will produce an interesting texture, but keep in mind that due to the nature of a roller, it should only be used if you child has decided to use a single paint color. You might also want to try out a regular sponge, which can produce some really cool patterns when used as a paint applicator.
Adding A Foreground
Once your child has filled in the geometric shapes with paint, they have a choice as to whether or not they want to let the paint dry before the next step. If not, they may add additional colors of paint on top of the base coat. They will want these new features to be thinner in nature than the background coat. They can do this by using a thinner paint brush, or even drizzling wet paint from a popsicle stick on top. When the paint is wet, there is also the opportunity to start adding other mediums as well. Glitter is a choice that a lot of kids will love. Sequins, buttons and even confetti are some other ideas that can work.
If they let the paint dry, they can treat the initial layer as a background and layer additional objects with paint on top. Often what looks good is adding objects with more discrete or thinner lines. They can even traverse the masking tape when painting these new objects to create a continuity with the background. To create thinner lines on a canvas, have your child reach for an angled or round shaped brush, which will give them finer control over the paint being applied.
Another cool thing to do with these types of art projects is to splatter some paint on top, using a flicker technique.
Once all Paint has dried, you child can carefully and slowly peel off the masking tape to reveal the bare canvas below.
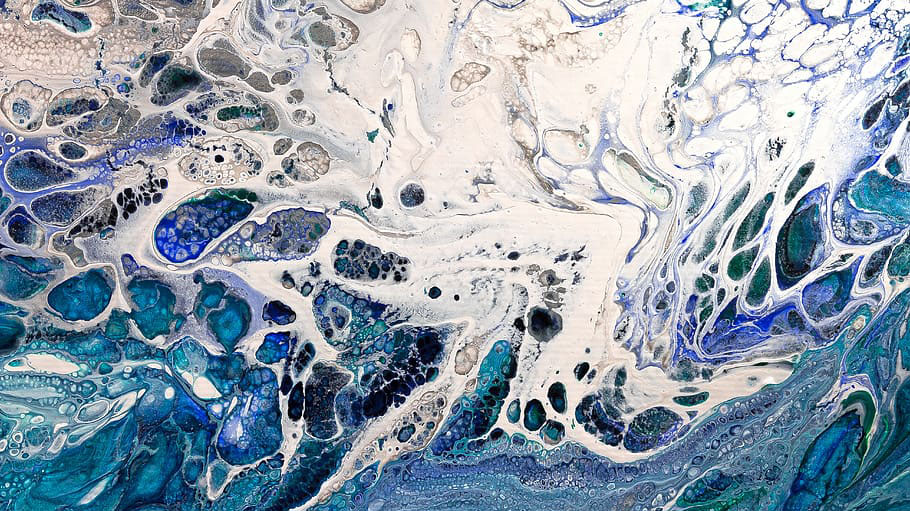
Saran Wrap Abstract Acrylic Painting Projects For Kids
Using Saran Wrap to produce an abstract acrylic art is so simple kids can easily create something stunning! It is conceptually similar to placing paint on paper and folding it in half like they do in kindergarten. We describe here two of the techniques we have seen that produce some of the best results. Choose the technique you think is appropriate for your child as the target audiences are somewhat different. In both cases, if the canvas is bigger than the width of the saran wrap, you will want to combine multiple pieces with enough overlap that the paint does not push through the cracks.
The Roller Technique
With this technique, you will need a small paint roller or a rolling pin from your kitchen. It also works best with multiple colors of paint. Direct your children to gently squeeze the paint tubes and place different sized globs of paint on the canvas. You will want them to create different shapes, some circular and some linear. Straight lines may be a little harder for young children to do, so you may need to guide them a little bit, helping them to keep a constant pressure on the tube as their hands travers the canvas. Try to distribute the paint so that there is a consistent amount of white space between each glob. Also, stay away from the edges, these areas can be filled in later if desired.
Once your kid is done globing the paint on the canvas, they should carefully lay the saran wrap on top of the canvas so that it is completely covering the canvas. Next, take the roller and flatten out the paint globs. They should start slowly so that the paint does not shoot too far under the plastic. Once the paint has flattened out, they can roll a little more vigorously. Once the paint is spread to their liking, they can gently remove the saran wrap. At this point, they can add additional mediums like glitter, string or buttons, or they can use a smaller brush and add additional paint features.
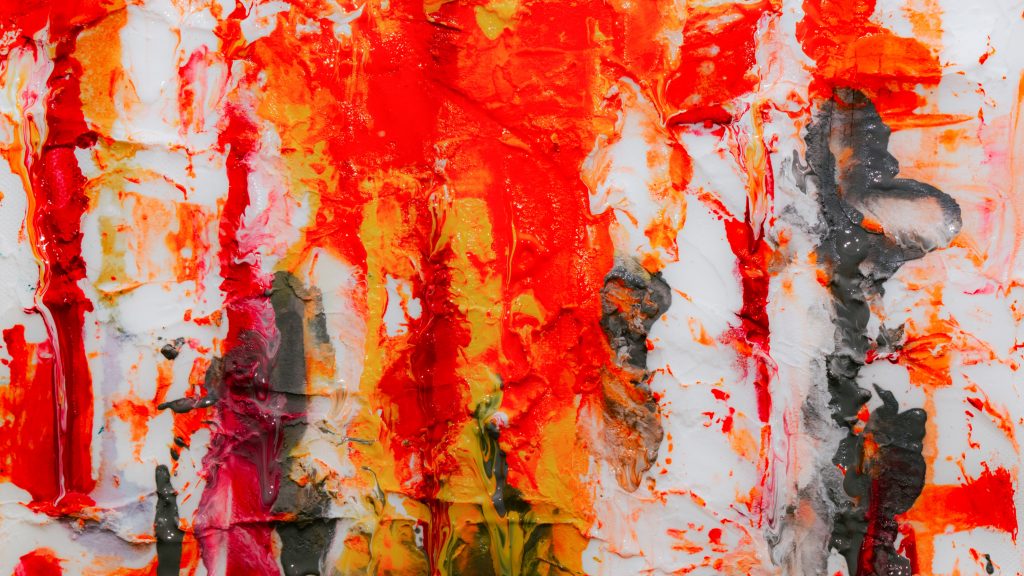
The Wrinkle Technique
The second technique may be slightly more mature, so make sure it is age appropriate. This is mainly because it uses a reduced number of colors. One color range for a background and one for the foreground. It also takes a little more patience as there is a drying step required.
First create a background in a color of their choice. To do so, use a larger brush, either sponge or bristle, depending on the texture they prefer. They can practice the technique of paint blending here if it is age or skill level appropriate. Again remember that adding a spray of water to the canvas will increase paint absorption. You children should cover the entire canvas in paint, then let the canvas dry.
Once the paint is dry, pour a generous amount of a color that contrasts well with the background color. They should add enough paint so that when brushed, the entire canvas is covered with a thin layer. While the paint is still wet, have your children gently lay the saran wrap on top, making sure to keep it flat. Once the plastic is covering the canvas and paint, your children can start creating wrinkles in the saran wrap by gently moving their hand over the top, and pinching slightly. Leave the saran wrap on top until the paint dries, after which, gently pull the saran wrap off to reveal their beautifully sophisticated creation.
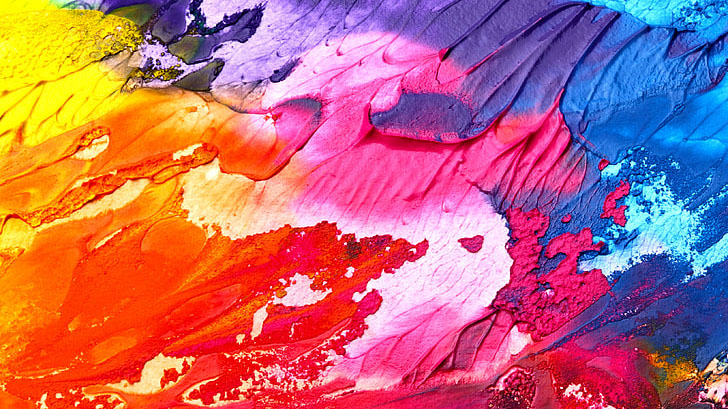
Abstract Acrylic Paint Pouring Technique For Kids
The last technique we will describe here may be the easiest one. In this project, your kids will simply pour large amounts of paint onto a blank canvas, and slowly move the canvas, letting the paint drift in multiple directions.
Before starting, make sure to place a protective layer around your child’s art space, the paint is going to drip off the canvas a lot. To set this project up, simply mix acrylic paint with some water in plastic disposable cups. Each color should be kept in a separate cup, unless you are trying to create a new color. Canvas wise, it’s probably best to use a smaller one. This is so that your child will have an easier time manipulating the canvas during the spreading phase.
Once the paint has been mixed into a liquid state by the addition of water, carefully pour each color into a single cup. Do it slow enough so that the colors do not mix together too much. As much as possible, each color should form its own layer in the cup. With all the paint in a single cup, instruct your child to place the canvas on top of the cup. Next, they should swiftly (but carefully) invert the canvas and cup so that the cup is now upside down on top of the canvas. Finally have them slowly lift the cup off the canvas, freeing the paint inside to spread across the canvas.
As the paint spreads, have your child pick up the canvas and start to tilt it in each direction, allowing gravity to pull the paint toward the tilted side. They can allow the paint to drip off the edges if they choose to. Once they are satisfied with the outcome, let the paint dry overnight in a safe place where it will not be disturbed and has room to breathe.